Pages

Tuesday, February 15, 2011

Cooking with Henry and Elliebelly - Raspberry-peanut butter-marshmallow waffles

Cooking with Henry and Elliebelly


One of the activities my two boys (ages 5 and 7) and their 2 year old cousin all love to do together is play with the play kitchen at my parents' house. There's just something about pretending to cook that appeals to kids. For a long time, before we had our own play kitchen set up in our home, it was one of the things my kids were most drawn to at children's museums and friends' houses. Come to think of it, my sister and I are four years apart and rarely played together growing up but my sister's Little Tikes kitchen was one thing that we both enjoyed.

Me and my sister, circa 1986.

Carolyn Parkhurst's Cooking with Henry and Elliebelly (illustrated by Dan Yaccarino) perfectly captures young childrens' fascination with cooking and creating. We are introduced to siblings Henry and Elliebelly via their cooking "show". Henry, the older sibling, has his own vision of how their show should proceed. As Henry tries to instruct his "viewers" in the finer points of making raspberry-peanut butter-marshmallow waffles, the toddler Elliebelly wreaks havoc and frustrates Henry with her very toddlerlike demands. First she insists she be allowed to help. Then she orders Henry to wear a pirate hat. Frustrated but undeterred, Henry gamely works around his dervish of a sister until their play is interrupted by their (offstage) mother's offer of real waffles.

One of the things I love most about this book is that the author clearly gets how kids play, and how easily older siblings become frustrated with their younger siblings. Reading the interactions between Henry and Elliebelly is a lot like listening in on my own kids as they play in one room while I'm in another. It was a nice touch to have their mother's offstage responses to their bickering presented in quote bubbles. Henry and his little sister are a bit younger than my own kids but their personalities are remarkably similar. It's not a stretch to accept that Elliebelly insists Henry wear a pirate hat while they do their "show" because I have a son who likes to wear a Batman cape while doing just about anything.

We decided to make Henry's raspberry-peanut butter-marshmallow waffles, with one caveat: we didn't follow Henry's recipe. His recipe calls for "Seventeen cups of imported flour from Kansas," and duck eggs. And that is before Elliebelly decides to add pizza and "Baby Anne" to the mix. Yeah. I think we'll stick with a more traditional approach. If you can even call raspberry-peanut butter-marshmallow waffles traditional. We whipped these up for an after school snack.

Raspberry-peanut butter-marshmallow waffles


Ingredients:

  • 2 large eggs 
  • 1 cup Pamela's Baking and Pancake Mix
  • 3/4 cup water
  • 1 tablespoons oil
  • 2 tablespoons peanut butter (more if you desire a more peanut buttery taste)
  • mini marshmallows
  • raspberry fruit spread 
Additional equipment: waffle iron.

1. Prepare base waffle batter. Mix together eggs, Pamela's mix, water and oil. Stir until combined.


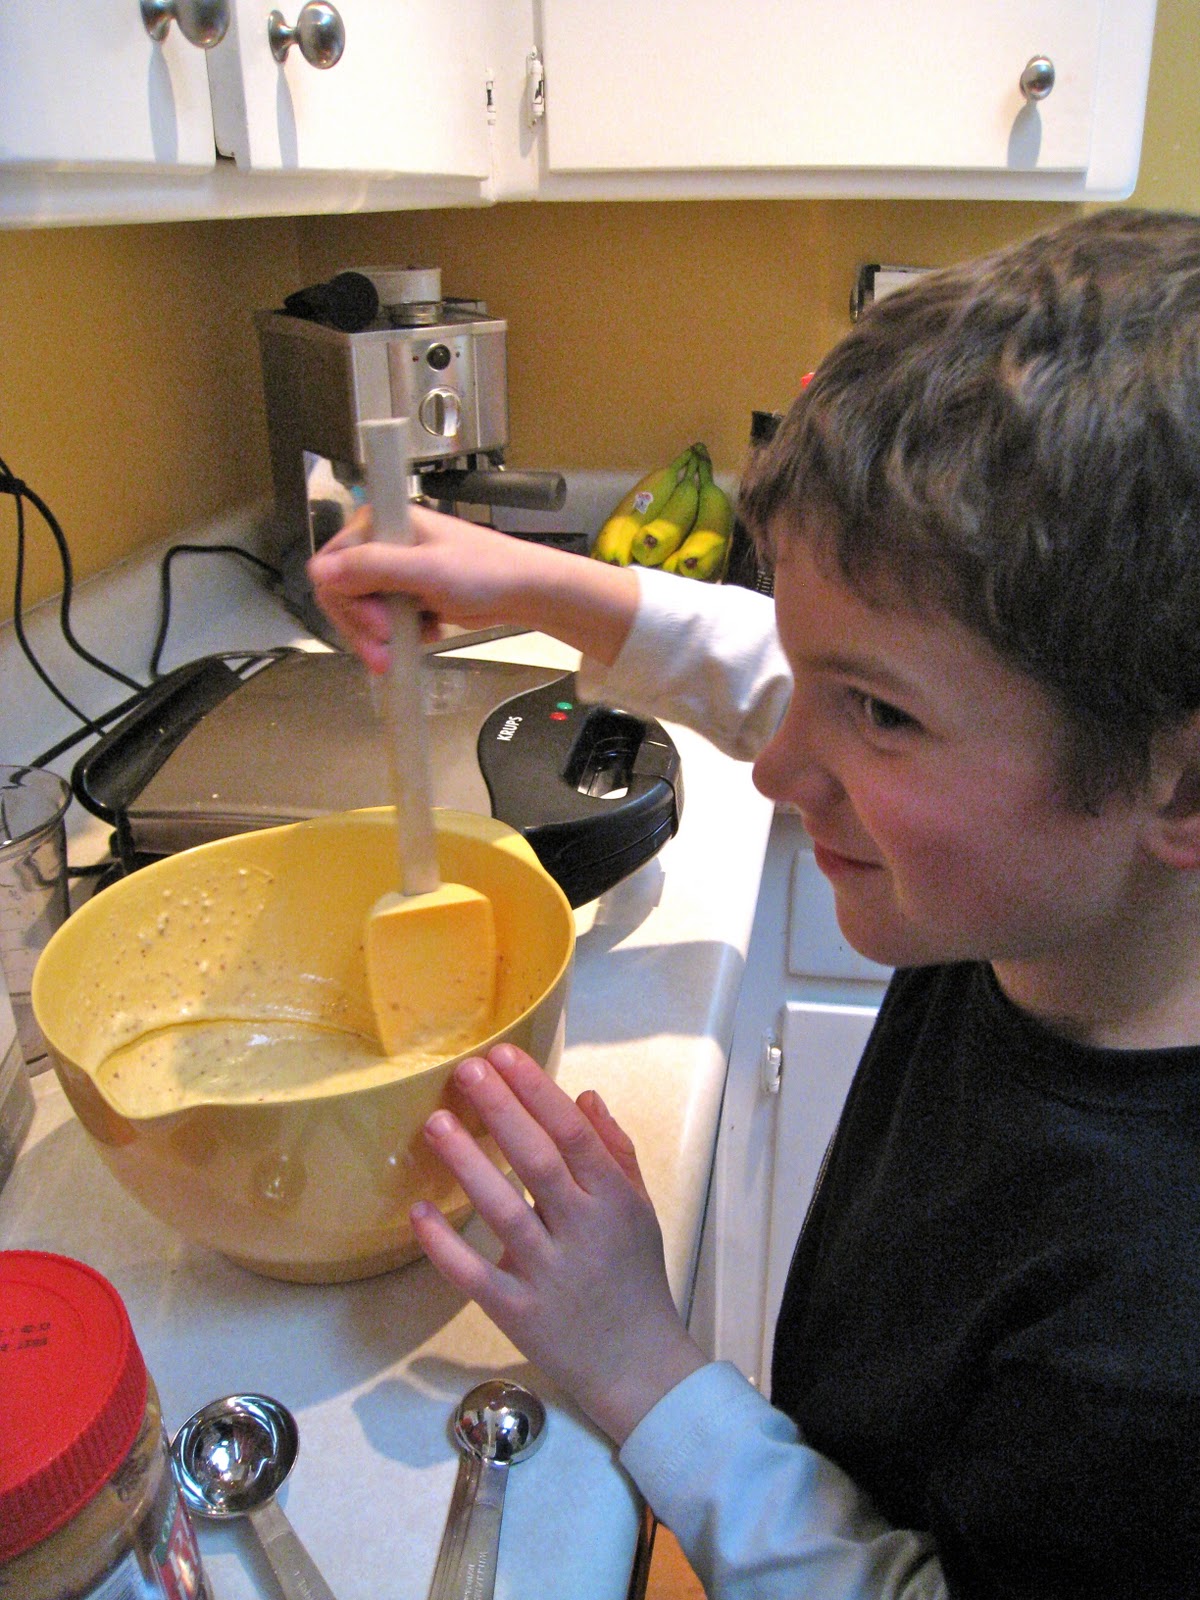
2. Stir 2 tablespoons peanut butter into batter.

3. Fold in 1 or 2 handfuls of marshmallows.


4. Pour batter into heated waffle iron. This was exactly enough for 4 waffles.
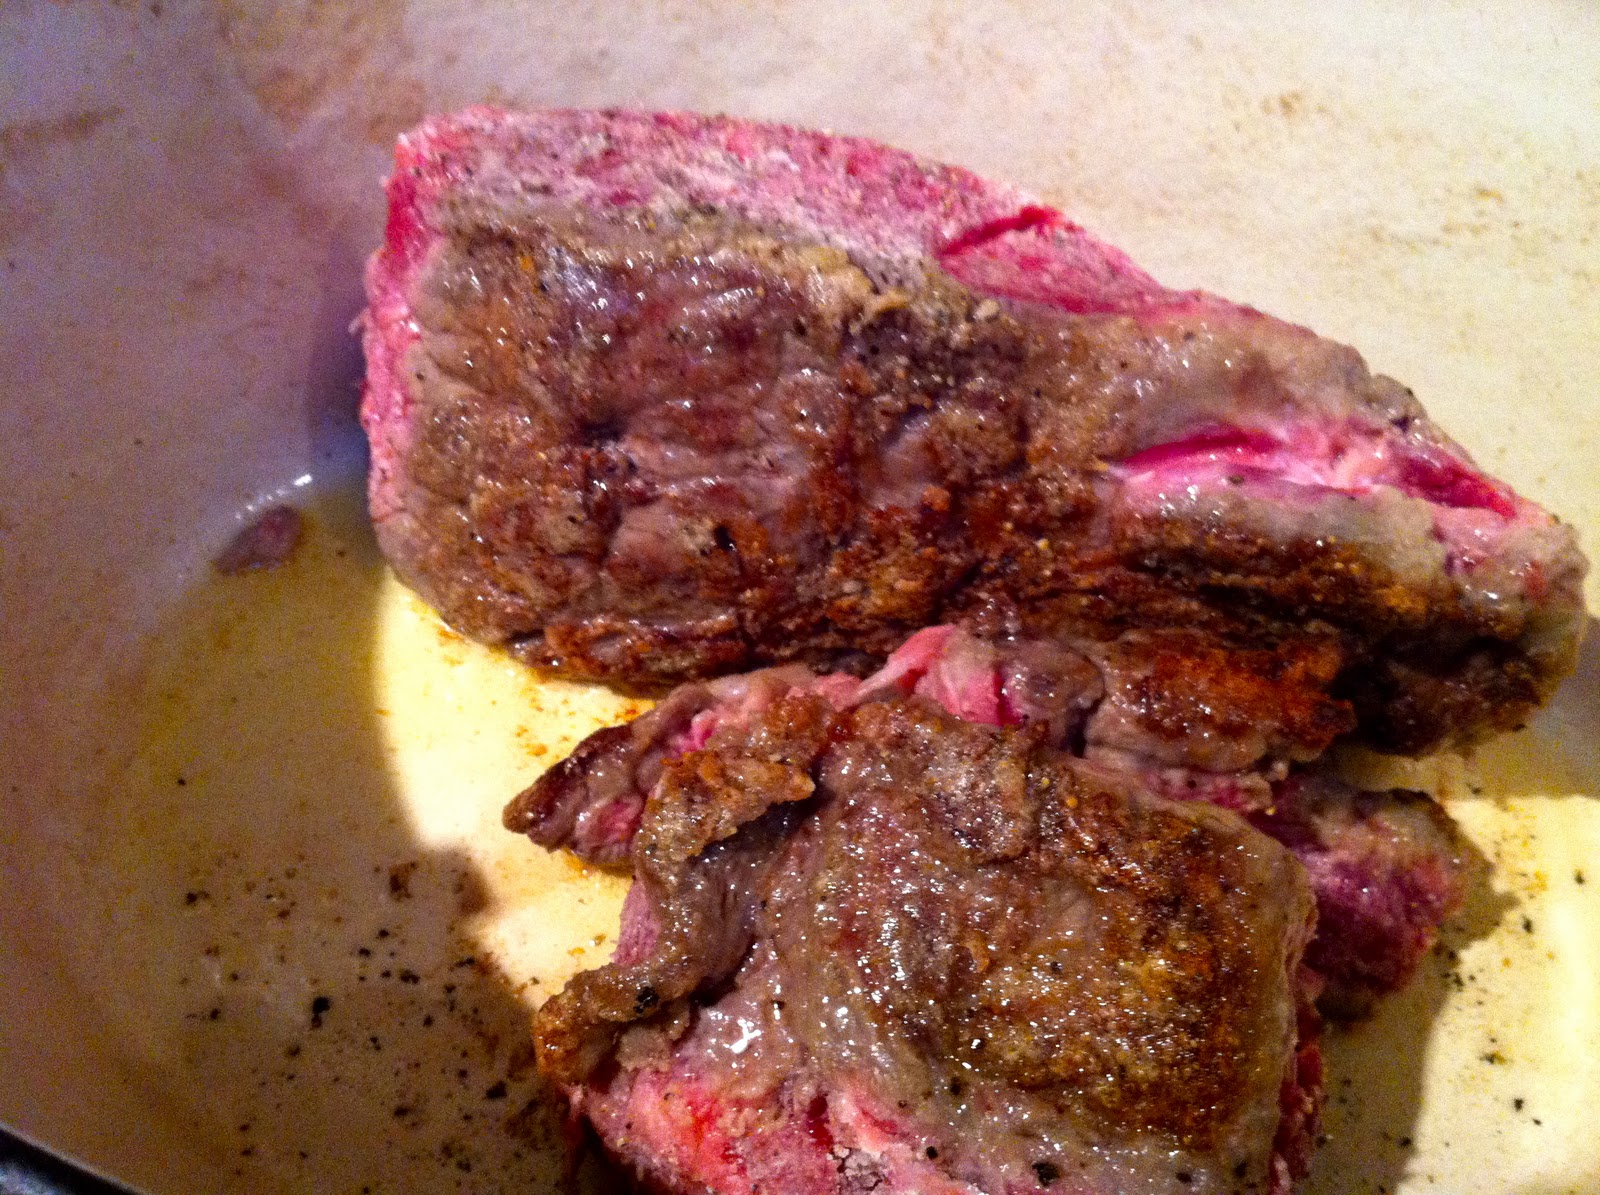

Avoid this.


5. When cooked through (1 - 2 minutes) carefully remove waffles from iron. Top with raspberry fruit spread.


These were easy to throw together and made for a sweet snack. They had a light peanut buttery taste and the raspberry spread was a nice complement. Watch, my kids will probably ask me to make these all the time now.

* As an Amazon affiliate I receive a small commission when items are purchased via links on this blog. Thank you for supporting Eat Their Words! 

Wednesday, February 9, 2011

George and Martha - Split Pea Soup

"Martha was very fond of making split pea soup Sometimes she made it all day long. Pots and pots of split pea soup." - James Marshall, George and Martha

George and Martha


I love soup. During the winter months I make soup a minimum of once a week. I'd make soup every night if I thought I could get away with it but I suspect that would result in my family surreptitiously trying to dispose of their leftovers in their shoes. Like George does in George and Martha, James Marshall's sweet and funny book (the first in a series) about two best friends.

In Marshall's very short chapters (or vignettes, if you will) we are introduced to George and Martha, two best friends who occasionally get on each other's nerves and aren't afraid to put each other in their proper places. They are a bit like Frog and Toad, or Bert and Ernie. Despite misunderstandings, their friendship is what holds them together.

It doesn't hurt that the stories have a lot of kid appeal. In one story, Martha chews George out for being a peeping tom (this comes off as hilarious, not creepy). In another, George breaks his "favorite" tooth and must have it replaced with a gold tooth (I was fascinated by this when I was a kid). And then there is the infamous split pea soup story. In it, Martha repeatedly serves George her homemade split pea soup. George, too polite to tell Martha he hates split pea soup, quietly puts up with it until one day he can stand it no longer and dumps his bowl (his tenth of the day!) in his shoe. Unfortunately Martha has seen the whole thing. Instead of being offended, she gently suggests he tell her the truth next time . . . and confesses that she, too, hates split pea soup. She just likes making it.

I have to thank my friend Jess for reminding me about the split pea soup chapter in this book. I thought George and Martha were hilarious when I was growing up so I'm not sure why it took me so long to introduce them to my boys. At five and seven, my boys are just the right ages to find the stories absolutely hilarious. We have George and Martha: The Complete Stories of Two Best Friends (you can get the books individually but trust me, you won't be able to stop at just one so save yourself the time and look for the compilation) out from the library right now and they can't get enough of the short and hilarious vignettes. "Just one more!" they beg. It is especially sweet to hear them giggle together as the seven year old reads them aloud to the five year old.

Anyway, coincidentally or not, I had been going through my Ina Garten cookbooks for soup recipes and the split pea soup recipe was beckoning. . .

Parker's Split Pea Soup (courtesy of Ina Garten and The Food Network; a version of this recipe also appears in The Barefoot Contessa Cookbook)


Ingredients:


  • 1 cup chopped yellow onions
  • 2 cloves garlic, minced
  • 1/8 cup good olive oil
  • 1/2 teaspoon dried oregano
  • 1-1/2 teaspoons kosher salt
  • 1 teaspoon freshly ground black pepper
  • 2 cups medium-diced carrots (3 to 4 carrots)
  • 1 cup medium-diced red boiling potatoes, unpeeled (3 small)
  • 1 pound dried split green peas
  • 8 cups chicken stock or water
1. In a stock pot, saute onions, garlic, oregano, salt and pepper for about 15 minutes, or until onions are translucent.

2. Add carrots, potatoes, 1/2 pound of split peas and stock/water.

3. Bring to a boil then simmer, uncovered, for 40 minutes.

4. Add remaining peas and simmer for another 40 minutes, or until peas are soft.  Stir often to prevent soup from burning on the bottom of the pot. (Note: I had to simmer mine--on medium heat---well over 40 minutes and add extra liquid.)


Somewhat shockingly, both of my kids actually liked this soup. I thought it had a good flavor too. My husband wasn't a fan but it worked for 3/4 of the household so I consider it a victory. Note that this makes a good meat-free meal, and can be vegetarian if you use water instead of chicken broth.

*As an Amazon affiliate, I receive a small commission from purchases made via links found on this site. Thank you for supporting Eat Their Words!

Monday, January 24, 2011

Cookbook Review - Babycakes

BabyCakes: Vegan, (Mostly) Gluten-Free, and (Mostly) Sugar-Free Recipes from New York's Most Talked-About Bakery


You would think that after the holiday season--which included baking 50 snowman-shaped sugar cookies for the second grade classes at my son's school (that's 3 batches) and a batch for my own family--I would be all baked out. I admit, it did take me a little while to recover from my Christmas bakeapalooza and now we've got Valentine's Day class parties on the horizon. This past weekend, though, I felt like making bread. Not the sandwich bread I make every week in my bread maker but a nice, sweet quick bread. I pulled out a Christmas gift, Erin McKenna's Babycakesto look for inspiration.


Here's the thing about Babycakes, which features recipes used in McKenna's hugely popular New York City bakery: all of the recipes are vegan and mostly gluten- and (refined) sugar-free. I say 'mostly' because that's what the book's subtitle says. But really, if you have celiac disease or a gluten allergy you will want to read the recipes carefully because some of them do call for spelt flour. Anyway, because the recipes are vegan/gluten-free/sugar-free (and kosher) they call for ingredients like Bob's Red Mill gluten-free all-purpose baking flour, coconut oil, dairy-free milks and agave nectar. Most people don't happen to have these sitting around in their kitchens and they can be hard to come by (though they are becoming more mainstream--I've seen them at Target!). However, once you have McKenna's favored ingredients on hand you can use them for almost any recipe in the book.

Back in October, when I had this book from the library, McKenna's pumpkin spice muffins were my first attempt at baking the Babycakes way and I can't say it was my most successful baking attempt. It had nothing to do with the recipe itself and everything to do with the user: I had gotten it into my head that I wanted pumpkin bread, and nothing else would do. The thing never cooked through, even after leaving it in the oven well over the cook time. This time I knew better and the only modification I made to the recipe for banana chocolate chip bread was to use non-fat cow's milk in place of rice milk. All told, I could have baked it a little longer because the very middle was a little undercooked but the top was nicely browned and the toothpick I inserted came out clean. Maybe I have been eating gluten-free for too long, but I wouldn't have known the bread doesn't contain gluten. My kids ate it up and asked me to put slices in their lunch boxes for their snack today.

My five year old, mashing the bananas.

Banana chocolate chip bread, fresh from the oven.

While not specifically a kid cookbook, the recipes in Babycakes appeal to the whole family and offer peace of mind to families who are concerned about food intolerances and/or healthy ingredients. In the section on tools and ingredients McKenna explains why she uses things like evaporated cane juice, agave nectar and coconut oil in place of more common ingredients. My five year old helped me make the banana bread and was most enthusiastic about mashing the bananas.

My family's main concern is gluten-free recipes but I appreciate this book's focus on vegan and sugar-free ingredients as well. I have been known to bake for my sons' class parties and there are other kids who have dairy and/or sugar intolerances. I like that, in many cases, one recipe can meet all three dietary needs. My only criticism of the book is that there is no way to tell, without reading the entire ingredient list, which needs each recipe targets. A simple key at the top of each indicating whether it meets vegan, gluten-free and/or sugar free standards would be helpful for at-a-glance browsing.

Babycakes is published by Clarkson Potter, the same group that publishes Ina Garten's Barefoot Contessa cookbooks, and like Garten's books it is printed on thick, glossy paper and features stunning full color photography. These are among my favorite cookbooks in my collection because they are well-designed and fun to look at (and they look good on my bookshelf). Good cookbook design makes the recipes look all the more appetizing. In an age where home cooks are turning to the Internet for recipes (I'll admit, I've got the Epicurious app on my iPad and I use it all the time) it's nice that publishers are still producing gorgeous cookbooks that appeal to all the senses.

Get this book: if you are gluten- or dairy-intolerant, vegan, or want to cut back on refined sugar but still enjoy baked goods from time to time.

Disclosure: As an Amazon.com affiliate I earn a small commission on products purchased via links featured on this site. Thank you for supporting Eat Their Words!

Thursday, January 6, 2011

Cookbook Review- Tiana's Cookbook

The Princess and the Frog: Tiana's Cookbook: Recipes for Kids (Disney Princess: the Princess and the Frog)


Sometimes I am left scratching my head at movie tie-in books. Sometimes publishers get it right. I love the way Disney/Pixar and Little Golden Books have collaborated to produce faithful and cooly illustrated adaptations of popular Disney/Pixar films. Other times I just wonder, what was the point? I've seen a few cookbooks based on random licensed properties but the recent ones based on Disney and Disney/Pixar films The Princess and the Frog (Tiana's Cookbook: Recipes for Kidsand Ratatouille (What's Cooking?: A Cookbook for Kids--which appears to be out of print but was available at my local library) get it right. Primarily because the central characters in these films have culinary aspirations. What better way to get kids involved in the kitchen than with a cookbook that features favorite characters and meals they might eat? Even better is when the recipes are for things you'd actually want to eat.

I wasn't particularly impressed with the Ratatouille cookbook. The recipes looked good and I think my older son would have enjoyed preparing some of them. However, most of the recipes relied on gluten-containing ingredients and just were not practical for the unique dietary needs of two of the four members of our household. It's not much of a kid-friendly cookbook if I have to take the additional step of adapting the recipes. However, the New Orleans-inspired recipes in Tiana's Cookbook were more celiac-friendly so it gets my wholehearted approval.

Full of New Orleans-inspired fare, Tiana's Cookbook is divided into sections for breakfasts, lunches, dinners, breads/sides/drinks and--most kids' favorite--desserts. I love that the New Orleans/cajun theme is carried throughout. How many kids' cookbooks have recipes for beignets or po' boy sandwiches? Obviously, the beignets don't work for us (without significant tweaking) but the sandwiches are doable if we use our gluten-free bread. The most useful section is the dinner section. Recipes for jambalaya and red beans and rice are easy for my seven year old to follow. Some steps (sauteing veggies in oil, chopping veggies) require my supervision but it's a step beyond assembling sandwiches. Each recipe includes a brief description (in the form of a "note" from Tiana) and photo. Illustrations of characters from the movie appear every few pages. I particularly like that there is a lot of healthier fare here: fruit salad, oven-baked fish, green beans, smoothies, oven-baled potato wedges . . . the healthier recipes provide a nice counter balance for things like mud pie and macaroni and cheese.

As far as the princess theme of the book goes . . . well, I have two boys. They will only grudgingly watch Disney princess movies with me (I am still waiting for them to acknowledge the artistic genius of Sleeping Beauty, my favorite animated Disney movie. I don't see it happening.) They saw The Princess and the Frog when it was in the theater and they enjoyed it but not enough to see it again. That's okay; my seven year old is still enthusiastic about taking responsibility for making some of our meals and to him, a recipe is a recipe, even if it's illustrated with flowers and princesses. Though I'm sure my boys would prefer a Batman cookbook.

Get this book: if you want a childrens' cookbook that offers something more than typical "kid" food or you have a princess-obsessed child. How fun would it be to create a Princess and the Frog themed dinner to be followed by a viewing of the movie?

Monday, December 20, 2010

Arthur's Christmas Cookies - Salt Dough Ornaments

"'Maybe I could still use my cookies,' said Arthur. 'Maybe I could paint them all different colors.'" - Arthur's Christmas Cookies, Lillian Hoban


Arthur's Christmas Cookies (I Can Read Book 2)


There are a lot of seasonal treats I enjoy (Gingerbread latte, anyone?) this time of year but if I could choose only one Christmas treat to indulge in it would have to be, without a doubt, the frosted sugar cookie. Oh, you can keep your peanut butter kisses and candy cane twists. When I think Christmas cookies, I think sugar cookies (thanks, Aunt Sue). There is just no other acceptable choice.

Arthur's Christmas Cookies is not a book about sugar cookies though, not really. While it starts out that way it actually ends up being a book about a recipe gone wrong and the surprising result. Arthur is frustrated because he's trying to make Christmas presents for his parents but nothing is turning out. Finally, he decides to make Christmas cookies in his sister Violet's Bake-E-Z oven. What initially begins as a solo effort turns into mass chaos as his friends and sister get involved. Once the cookies have been baked and they are about to snack on a few, they realize that Arthur hasn't made sugar cookies. Due to a mixup, he's used salt instead of sugar and he's actually made clay cookies. At first Arthur is upset that yet another present has been ruined . . . until he realizes he can paint his clay cookies and give them to his parents as ornaments.

One of the things I like about this book is that it acknowledges that mistakes in the kitchen do happen, and that it's okay. We might not always be able to salvage our mistakes the way Arthur does, but it's nice to know that we aren't alone when we put too much salt in the cookie dough (or baking soda, as the case may be--not that my 14-year old self would know anything about that).

Arthur's Christmas Cookies is written and illustrated by Lillian Hoban, half of the duo responsible for the popular Frances books. There are a lot of similarities here, not just in the illustrations but in the storyline and even the writing style. I remember reading the Arthur books as a child and though my kids are big fans of Frances I had kind of forgotten about Arthur. Picking this book up was like being reunited with an old friend. My kids enjoyed it too; even though it was published in 1972 it still feels fresh and relevant. Salt dough ornaments are still a great Christmas craft.

Salt Dough Ornaments


Ingredients:

  • 1 cup salt
  • 1 1/4 cups warm water
  • 3 cups flour*
*Because we were not eating these ornaments, I made them using regular old all-purpose flour. 

1. Dissolve salt in warm water.

2. Add flour to the salt water.

3. Mix flour and water thoroughly and knead for several minutes. This will help work out air bubbles.

4. Roll dough out and cut shapes out using cookie cutters.


5. Bake dough in a 200* oven for 1,5 to 2.5 hours, or however long it takes to bake out all of the moisture. If your dough is thicker it will take longer. (I lined my cookie sheets with parchment paper.)

6. When ornaments are completely cool, paint using acrylic paints. After the last coat of paint dries, "seal" using varnish (we used a paint-on varnish).


My rocket.

Some finished ornaments some lucky friends and relatives will receive as gifts.


My kids enjoyed this craft a lot. However, at 5 and 7 they haven't quite developed the patience necessary for a project that involves waiting for various coats of paint to dry. If you plan on using several colors and layers, it can be an all day project (especially if you paint both sides of the ornament). What they lack in patience, though, they make up for in creativity. I was impressed with the way they chose their colors and executed their artistic visions. On this level, it was far more successful than the first time we tried this three years ago. We definitely plan to do it again next year, perhaps getting a little more creative with the shapes we choose.

Thursday, December 9, 2010

How the Grinch Stole Christmas - Roast Beast


"They would feat on Who-pudding, and rare Who-roast-beast
Which was something the Grinch couldn't stand in the least!" - How the Grinch Stole Christmas, Dr. Seuss


How the Grinch Stole Christmas!

That's right. I made a roast. I really had to ask myself: does the novelty of making something called "roast beast" make up for the fact that making it is an elaborate and time consuming affair? And the answer is yes. I make a roast like twice a year so I might as well make it now.

I hope everyone is familiar with Dr. Seuss' How the Grinch Stole Christmas. If you aren't familiar with the book then surely you are familiar with the animated cartoon version that airs on television every year around this time. It's a holiday classic. But if you need a refresher...

The Grinch is a surly kind of guy who hates Christmas and all of the happy citizens in Who-ville who love it. (Clearly, he is just lonely and misunderstood and only acts out to mask his pain.) While grousing about how much he hates the season he is struck with inspiration: he will prevent Christmas from coming! He puts his plan into action and soon is sneaking into each home on Christmas Eve to make off with all of the Christmas trappings. But something goes wrong. As the Grinch is congratulating himself on Christmas morning, he realizes he can hear singing coming from Who-ville. Despite his best efforts, he hasn't ruined Christmas at all. The Whos may not have presents or decorations but they have each other and the Grinch is stunned to realize spirit of Christmas comes from within. He begins to have second thoughts about what he has done. Filled with the Christmas spirit, his heart grows "three sizes" and he returns to town to return all of the things he has stolen. He even presides over Christmas dinner, where he carves the roast beast. Awwww.

Obviously, we had to make roast beast in honor of the Grinch. Knowing Dr. Seuss the roast beast is probably some sort of moose or mammoth or something (the picture leaves it open to interpretation) but for our purposes I decided it was beef.

Roast Beast (really Ina Garten's Company Pot Roast)
(I did not follow Ina's recipe to the letter. What follows is my interpretation of the original recipe.)

(Ignore the tomato paste--I purchased it for a different meal and it somehow ended up in the picture)


Ingredients:
  • 3 lb. (the recipe recommends 4-5 pounds) boneless beef chuck roast
  • Kosher salt and black pepper
  • flour (Pamela's gluten-free bread mix/flour blend)
  • olive oil
  • 2 cups chopped carrots
  • 2 cups chopped yellow onion
  • 2 cups chopped leeks
  • 5 large garlic cloves, crushed
  • 2 cups red wine
  • 2 tablespoons brandy
  • 1 can diced tomatoes
  • 1 cup chicken stock
  • 1 chicken bouillon cube, or equivalent
  • 3 branches fresh thyme
  • 2 branches fresh rosemary
  • a tablespoon unsalted butter, at room temperature
Additional equipment: French oven (sometimes called a Dutch oven), immersion blender (or food processor).

The first thing you should know is that this is a fairly elaborate undertaking. Be prepared to spend some time in the kitchen. The cook time alone is 2+ hours. Fortunately, once you have everything in the oven you can ignore it for awhile.

1. Preheat oven to 325*. While oven is heating chop your vegetables. I always chop mine and throw them in a large bowl, then set aside for later.

2. Season the beef with salt and pepper. Dredge in flour (making sure all sides are covered).

3. On the stovetop, heat 2 tablespoons of olive oil in the French oven. Sear meat on all sides, then remove and set aside.

The meat, mid-sear
4. Add 2 more tablespoons oil to the French oven. Add vegetables and garlic and cook until softened.


5. Add wine, brandy, tomatoes (with liquid), chicken stock, bouillon, rosemary, and thyme. Once boiling, place the meat in the French oven. Cover, remove from stovetop and place inside oven for about 2.5 hours, or until meat is fork tender. About an hour into the cook time turn heat down to 250*.


6. When meat is finished cooking, remove from oven. Place meat on a separate plate. Remove the herbs and discard. Remove about half of the liquid and veggies and place in a separate bowl. Puree using an immersion blender (or food processor) and return to French oven. Place on the stovetop and let simmer on low heat. While simmering, mix butter and 2 tablespoons of flour together and add to pot. Let sauce simmer until thickened.

7. Serve meat with sauce and veggies on top. I served toasted garlic parmesan bread alongside the meat.


This meal takes a long time to cook but the results are well worth it. While it was in the oven my kids complained that they just wanted something else for dinner, but as the aroma permeated the house they began to get excited about the "roast beast". I think they set a new record for the number of times "roast beast" can be uttered in one evening. "The roast beast smells good."  "I can't wait to try the roast beast." Obviously, changing the name of an old dish somehow makes it taste better; I can't imagine they would have been so excited over plain old pot roast.

And really, this is much better than plain old pot roast. The addition of the wine and adding the puree at the end really classes it up and gives it a rich, velvety flavor. I don't think I can go back to making pot roast in my crock pot after having it this way. Even if it does require a little more effort.

Wednesday, December 1, 2010

The Latke Who Couldn't Stop Screaming - Sweet Potato Latkes

"'I'm not part of Christmas!' cried the latke. 'It's a totally different thing!'" - The Latke Who Couldn't Stop Screaming, Lemony Snicket

The Latke Who Couldn't Stop Screaming: A Christmas Story


I like the holidays. They may be my favorite time of year. I love holiday treats, holiday music and favorite holiday specials. I love the smell of California mornings on cold (but not too cold) days in December and all the ways my husband and I plot to surprise our kids on Christmas morning. As we head into December I plan to feature many of my favorite holiday books here on the blog. At this time of year "holidays" are usually synonymous with "Christmas" so yes, I will be writing about Christmas (as well as general winter) books. But tonight is the first night of Hanukah, so I find it only appropriate to acknowledge the holiday with one of the funniest holiday books I have ever read: The Latke Who Couldn't Stop Screaming.

The Latke Who Couldn't Stop Screaming is written by Lemony Snicket (illustrated by Lisa Brown). If you are at all familiar with his Series of Unfortunate Events books, you know that this isn't going to be your typical heartwarming holiday yarn. If you were totally turned off by Pierre and Monsters Eat Whiny Children in my last post, this may not be the book for you. If you dig slightly deranged holiday tales, read on.

A latke is a potato pancake made from shredded potatoes and cooked in oil. It is commonly served as a part of Hanukah celebrations. As a holiday symbol, it is not as flashy as Christmas lights or as sweet as candy canes. And our titular latke, who has jumped out of a pan of boiling oil and run away, is frustrated--because none of the other holiday symbols he meets really understand what he is or how he fits into Christmas. He explains to each one, as he meets them, that he is not "hash browns" and not a part of Christmas. And that what he is a part of--Hanukah--is not Christmas. He relates the story of Hanukah to the Christmas lights, a candy cane and a pine tree as he encounters them (all the while growing increasingly--and hilariously--angry that they don't really get it). Finally, after he has slumped under a pine tree in frustration, he is found by a family. A Jewish family who recognize him immediately and want to make him a part of their Hanukah dinner.

This book is great because it works on two levels. I have Jewish friends who really do feel the way the latke does during the Christmas season: frustrated with the constant barrage of Christmas and the ignorance of some people who really don't understand that Hanukah isn't "Jewish Christmas" simply because it is celebrated during the same time of year. But it's also a book for those who want to learn more about Hanukah and understand, through the latke, why their Jewish friends might be so frustrated during this time of year.

Our angry latke, as illustrated by Lisa Brown
After reading the book together my kids, of course, wanted to make latkes. Which had always been my plan.

Sweet Potato Latkes with Applesauce and Eggs


Brown's illustrated latke-making instructions


This meal went through several revisions before it became what you see in the pictures. At first I had planned to make my latkes using frozen shredded potatoes. Not because I wanted to take the easy way out but because my husband is of the opinion that frozen potatoes fry up better than fresh. And I usually defer to him because he is the more skilled cook. Then my seven year old asked if I could make sweet potato latkes instead (he has a friend at school whose family makes them this way). I had not considered this at all. However, my seven year old has a deep hatred of shredded potato products. To the point that two nights ago he got himself so worked up over the apparent horror of tater tot casserole that he actually vomited. In my kitchen. Not wanting a repeat of this scenario, I acquiesced and resigned myself to the fact that I would be making sweet potato latkes from scratch. Though I did add in some frozen shredded potatoes to balance out the sweetness of the sweet potato.

Then I ran into the problem of what to serve with the latkes. Finally, buried deep on the third or fourth page of Google results (search term: "what to serve with latkes") was a Smitten Kitchen post in which fried or poached eggs were offered as a suggestion. Having just purchased eggs, I decided this sounded like a fabulous idea.

"But can we use the Mickey Mouse egg molds?" my seven year old asked.

So there you have it. Sweet potato latkes with applesauce and Mickey Mouse shaped fried eggs. I'm still not sure what Mickey Mouse has to do with Hanukah but seeing as how we aren't even Jewish to begin with I guess we'll let it go.

Ingredients:
  • shredded sweet potatoes
  • shredded frozen potatoes
  • shredded yellow onion
  • olive oil for frying
  • applesauce
  • fresh eggs
  • 4 tablespoons flour (I used a gluten-free flour blend)
  • pinch of cayenne pepper
  • pinch of salt
1. Peel your sweet potatoes and grate using a box grater. I started with three potatoes and used two. Wrap shredded potatoes in paper towel to wring out the moisture. Put the shredded sweet potatoes in a large mixing bowl.


2. Add frozen shredded potatoes to the mixing bowl. About 2/3 of my mixture was sweet potato and 1/3 was the regular potatoes. Mix together.


3. Using the grater, grate the onion into the mixing bowl. Add two eggs, salt, cayenne pepper and flour and combine with the potatoes.

4. Heat your olive oil in (preferably) an iron skillet. When the oil is hot drop small scoops of potato mixture in the skillet. Use the back of a spatula to flatten the latkes. Let cook on medium heat for 5 minutes on each side. I got better at this with each batch. The first ones were kind of fell apart because I didn't cook them long enough.


5. As you remove your latkes from the skillet, place on paper towels to absorb the excess oil. I made stacks with paper towels in between each latke layer.


6. Either simultaneously or after the latkes are finished cooking, make the eggs. I had to wait until the latkes were done because we only have one iron skillet and the egg molds don't work well in our other pans.


7. Serve your latkes and eggs with applesauce and/or sour cream.


I thought my sweet potato latkes were delicious (my husband thought they were too sweet and would have preferred using regular potatoes) and I take it as a good sign that my kids asked if they could take the leftovers to school for lunch. 

Happy Hanukah, to those of you who are celebrating tonight!